Collaborative Storytelling with Scratch
| Aim | To practice storytelling and collaborative work while learning digital skills and design thinking methodologies. The activity suits very well for subjects like Language, Foreign Language, Literature, Creative Writing, Art, or Technology. |
|---|---|
| Duration | 3 hours |
| Technology | Computers, Internet Connection (optional), Scratch (online or offline). |
| Materials | The ones stated in TECHNOLOGY plus paper sheets and pencils. |
| Student/teacher Ratio | max 25 students / teams of 3 or 4 children |
| Age of students | 8-14 |
Special information
We are using Scratch but the activity would work well too if using any other programming environment or digital storytelling tool for children (like Alice, Puppet Pals, Toontastic, etc.). The activity can be combined with chain reaction activities (physical-world contraptions, also known as Rube Goldberg machines) by adding sensors, motors, and physical-world materials (see below the extensions and sources of additional information).
Step by step overview
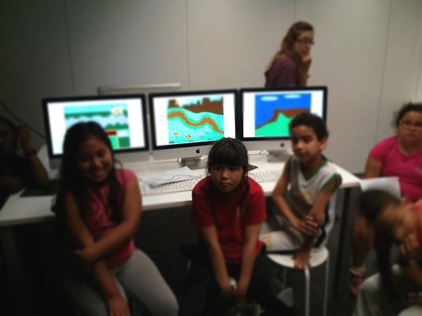
The idea is that the children (divided into teams) design and program a collaborative animation by using Scratch. Each team programs one part of the global story in their own computer, then they synchronize the parts, and at the end of the activity all the computers are put together in a line and the students can watch the full story where the characters move, speak and jump from one computer to the next.
1.- The teacher should tell the students that they all together will design and program an animation story where the characters jump from one computer to the next. If possible it’s great to have a demo (a story involving just 2 or 3 computers) to show the children the final effect. [10 minutes]
2.- The class decide the topic or the main storyline of the story. Brainstorming activities and a blackboard are very helpful at this stage. Teachers can talk about storyboards and show examples. [20 minutes]
3.- The class is divided in teams (3-4 students/team). Each team has one number representing their position within the story. [5 minutes]
4.- Considering the storyline and the position of teams, each group thinks and decides about which characters appear on their part of the story, which background they will use, and which actions will the characters perform. They use paper and pencils to design the background, draw their characters and write what happens exactly on their part of the story. If we want a great final effect, in each part of the story there should be a character that moves to the right side of the background and disappears. This character is the one that will appear on the left side of the background in the next part of the story. The teams have to coordinate with each other, deciding on the transitions between each part of the story, so that the full story makes sense. [25 minutes]
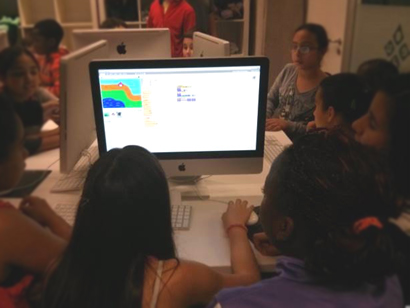
5.- Now it’s time to go to the computers. The teams open Scratch and they start creating the background and their characters. They can use the paint editor within Scratch, or any other editor, or they can even search for images on the Internet (It depends on the weight given to the artistic dimension of the activity). [30 minutes]
6.- Break [20 minutes]
7.- The teams use Scratch to program their parts of the story. It means that they program the characters (Scratch sprites) to move, speak and perform the required actions. This is the part of the activity that involves coding. If they are advanced users of Scratch and they have some free time, then they can even record their own voices for the dialogues. [45 minutes]
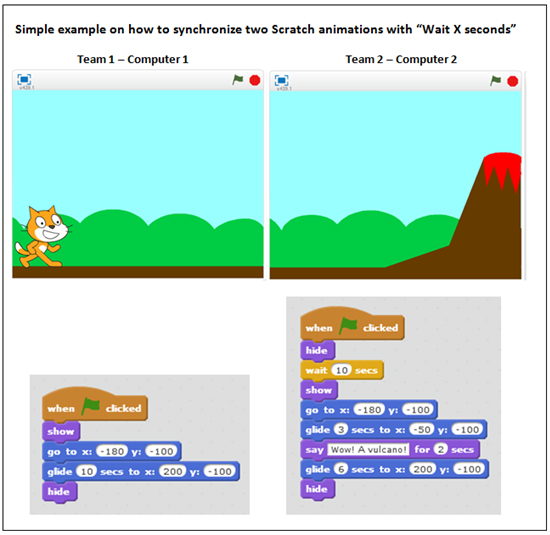
8.- After programming, the transitions from one computer to the other should be synchronized. There are different ways to do it, but the easiest way is to use the “wait X seconds” block of the Scratch control menu. For example, if Team 1’s story lasts for 23 seconds, then Team 2 should use a “wait 23 seconds” block at the beginning of their scripts, this way their sprites will start appearing, moving and speaking at the right time. And so on for the other transitions. [15 minutes]
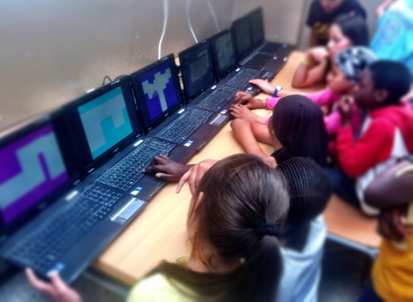
9.- Finally we move the computers and we put them in a line, this way we can all watch the final animation with the chained stories. We repeat the final effect several times and we adjust timings if necessary. [10 minutes]
Tips to make the workshop go smoothly
Since each computer receives input from the left (from the previous part of the story), and provides output to the right (to the next part of the story), it’s helpful if you can place them relatively close together to form a line or a circle.
Extensions and challenges
There is a very engaging extension of this activity that involves synchronizing the stories by using physical sensors and motors instead of using timers with the “wait X seconds” blocks. So the idea is to combine collaborative storytelling and chain reactions. If using Scratch then an easy option in order to implement this challenge is by using LEGO WeDo sensors and motors, which are compatible with Scratch. For example, when Team 1's story ends a motor is activated and kicks a ball that follow some path until it reaches the sensor connected to Team 2's computer, and this makes the next story start. To make physical-world contraptions some physical-world materials would be really helpful: cardboard tubes, balls, tape, dominoes, sticks, etc. In this extension laptops are more suitable than desktop computers.
Sources of additional information
Collaborative storytelling with Scratch (video): https://www.youtube.com/watch?v=5VAP7F4hUs0 Physical-Digital Chain Reaction using WeDo Robotics with Scratch (ScratchED online resource): https://http://scratched.gse.harvard.edu/resources/physical-digital-chain-reaction-using-wedo-robotics-scratch