Moving a robot around with Arduino robots
| Aim | Recognizing the main components of the robot and how to program them. Using the IDE to write and compile the code and to upload the executable program to the Arduino boards. Students will learn to write code, to understand the error messages and to debug them. They also will learn the concepts of function and functional parameters by observing the robot behaviour. |
|---|---|
| Duration | 2 / 3 hours |
| Technology | Arduino robots, computers with Arduino IDE installed, projector. 1 robot for 1 or 2 groups. 1 computer for each group. Groups composed by 2 students. |
| Materials | Prints of the program sketches if the projector is not available |
| Students/teacher Ratio | 20/1 with 1 or 2 additional instructors helping students to correct the errors. |
| Age of students | 14-16 |
Special information
Writing basic programs for Arduino Robot is simple also for beginners because no prior knowledge of electronics is required. Each workshop should be interactive: students write their own code following the teacher’s instructions displayed by a projector. They compile their own code and, once verified, they upload it to the robot. Students should be encouraged to change function parameters or command sequence in order to understand better their use and to comment on the expected output. The use of Arduino Robot should stimulate the students’ interest in programming. The interactive nature of the exercises is an effective method for maintaining the students’ attention.
Step by step overview
The basic structure of the workshop is composed by three activities (sketches):
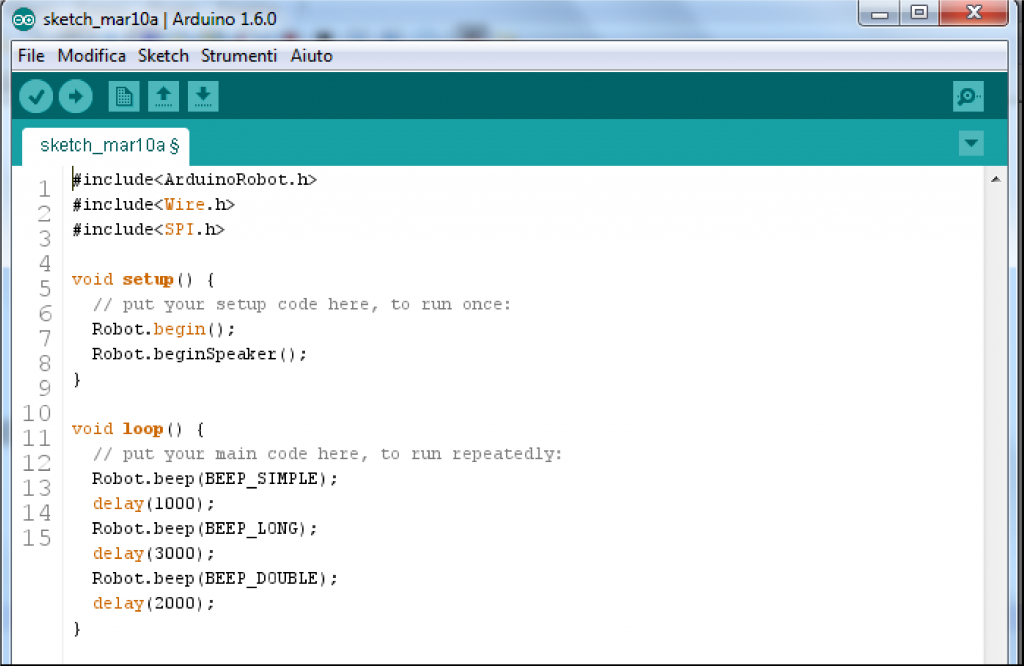
- Beep - caused the Robot to make a beeping noise. Duration, type and delay can be altered.
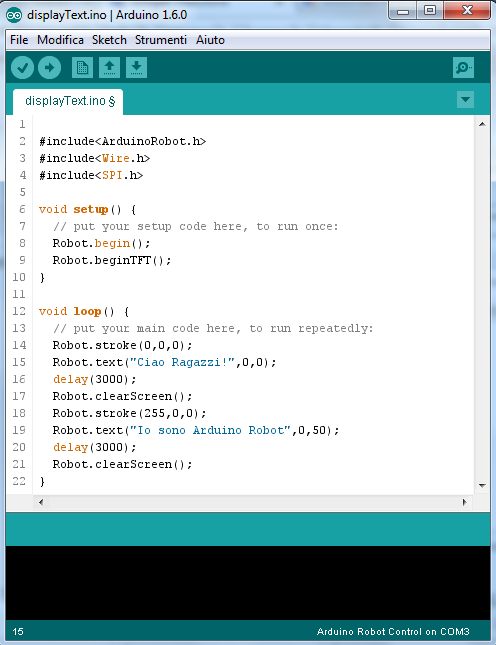
- Display text - display text on the Robots LCD screen. The text messages must be organized to fit within the limits of the LCD screen.
- Motors test - understand which commands are needed to drive, steer and stop the robot. Since the robot has two independent wheels controlled by two independent motors, students must workout how to turn effectively.

Steps 1 to 4 are about running the IDE, pairing the Arduino board and general setting.
- Step 1: Open the Arduino IDE.
- Step 2: Create a new Arduino sketch project.
- Step 3: Connect the Arduino board by the USB cable and select the Arduino "Robot Control" board from the menu.
- Step 4: Select the correct port that the Robot is using (it is different each time).
Steps 5 to 9 should be repeated for each basic sketch "Beep", "Display text" ad "Motors test".
- Step 5: Students follow the instructor by copying the syntax of the basic program from the project screen into their own Arduino sketches.
- Step 6: Save the sketch, compile it and (if the compiler doesn't show any errors) upload it to the Arduino robot. The instructor needs to explain how to execute these actions using the IDE.
- Step 7: Remove the USB cable, place the robot on the floor and turn the robot on. The instructor needs to explain how to do this using the tool bar.
- Step 8: Observe the robot behavior and relate this to the values of the parameters used.
- Step 9: Challenge the students to change the parameters within the code and again observe how the robots respond.
Tips to make the workshop go smoothly
It is recommended that students work in groups of two (ideally) or three (maximum) students and each robot is shared between a maximum of 2 groups. The presence of instructors helping students to correct errors that can arise during compilation is very important to avoid students getting stuck for a long time.
Extensions and challenges
The workshop is highly customizable. Starting from the original “Beep” program, students can be asked to write their own sequence in a sort of composition competition, or to try to recreate a given sequence. The same idea can be used, but starting from the original “Display text” and “Motors test” basic programs. Many other programs can be written combining these three different actions (beeping, displaying, moving). Moreover, depending upon the workshop duration, teachers can vary the difficulty of the task: how many and which sensors and executors use, which control structure introduce, etc.
Sources of additional information
Official web site of Arduino Project http://www.arduino.cc/